Getting Started
Note: If you are a member of an organization that is using Buck, please consult with your colleagues to see if your organization has site-specific documentation for Buck. Buck is flexible and configurable, and many organizations have created their own Buck documentation, which is specific to their use cases—in addition to the documentation here.
Quick Starts for various target platforms
Development for iOS is supported only on macOS.
This is a quick-start guide for getting up and running with Buck. This article is light on details, instead focusing on the commands that you need to run to install Buck and build your first application from scratch using Buck.
While not a prerequisite for installing Buck itself, in order to build iOS applications, you will also need to install Xcode.
This is a quick-start guide for getting up and running with Buck. This article is light on details, instead focusing on the commands that you need to run to install Buck and build your first application from scratch using Buck.
The commands in this guide are designed to be copy-pasteable, idempotent, and usable on its representative operating system (macOS, Linux, Windows). Sometimes this results in some unusual constructions (such as using echo instead of vi or Emacs to create a file). Bear in mind that this is a quick start guide, and few things are quicker than copy-and-paste!
Currently, there is no way to download a precompiled binary for Buck.
Windows 10 Build and Configuration Requirements
[Buck support for Windows 10 is currently in Beta]
In order to use Buck on Windows 10, you need to ensure that your installation of Windows meets the following requirements.
Windows version
You must be running Windows 10 build version 1703 or higher. Run the winver program to view which build version you have. If you are running an earlier version of Windows, work with your IT group to upgrade—or to install a recent build yourself, use the following Microsoft link:
Download Windows 10 Disc Image (ISO File)
Developer mode
You must enable developer mode on Windows. For instructions, go to
Enable your device for development
at Microsoft's Windows Developer Center.
Long pathnames
You must enable long pathnames. There are many articles on the web that provide instructions. The following Stack Exchange article consolidates the relevant information:
Windows 10: Enable NTFS long paths
Enable symlinks
If you are doing development work on the Buck source, you must enable the use of symlinks on Windows. In the Group Policy Editor, go to:
Local Computer Policy
  Computer Configuration
    Windows Settings
      Security Settings
        Local Policies
          User Rights Assignment
You should have a policy called Create symbolic links. Enable it for any users who will be running Buck on the local computer. You could enable the accounts of those users specifically or if all those users belong to a Windows security group, you could enable that security group. Restart your computer for this change to take effect.
Android SDK and Android NDK
While not a prerequisite for installing Buck itself, to build Android applications, you will also need at least the Android SDK and the Android NDK, which can be installed via Chocolatey or manually downloaded and installed.
While not a prerequisite for installing Buck itself, to build Android applications, you will also need at least the Android SDK and the Android NDK, which can be installed via Homebrew or manually downloaded and installed.
While not a prerequisite for installing Buck itself, to build Android applications, you will also need at least the Android SDK and the Android NDK, which can be installed via apt-get (or your distro's package manager) or manually downloaded and installed.The commands in this guide are designed to be copy-pasteable, idempotent, and usable on its representative operating system (macOS, Linux, Windows). Sometimes this results in some unusual constructions (such as using echo instead of vi or Emacs to create a file). Bear in mind that this is a quick start guide, and few things are quicker than copy-and-paste!
Buck requires Java 8
Buck currently requires Java 8; we are working toward support for future versions. If you have multiple installations of Java on your development computer, you might get warnings from Buck that you are using an unsupported version of Java. To resolve this issue, set the JAVA_HOME environment variable to the directory for version 8 of the Java Development Kit (JDK). Note that the directory that JAVA_HOME points to should contain a bin subdirectory which in turn contains binaries for the Java compiler (javac) and Java runtime (java).
Buck requires Java 8
Buck currently requires Java 8; we are working toward support for future versions. If you have multiple installations of Java on your development computer, you might get warnings from Buck that you are using an unsupported version of Java. To resolve this issue, set the JAVA_HOME environment variable to the directory for version 8 of the Java Development Kit (JDK). Note that the directory that JAVA_HOME points to should contain a bin subdirectory which in turn contains binaries for the Java compiler (javac.exe) and Java runtime (java.exe).
Install from Chocolatey
Buck regularly deploys Windows binaries to Chocolatey. Once Chocolatey is installed, you can install Buck by running:
choco install buck
This automatically adds buck to Chocolatey's path, and lets you run commands just by typing buck on the command line.
Install with Homebrew
Buck is available as a bottle on Homebrew.
Prerequisites
- Command Line Tools
Java Runtime Environment version 8 (support for future versions is in the works)
If you have multiple installations of Java on your development computer, you might get warnings from Buck that you are using an unsupported version of Java. To resolve this issue, set the
JAVA_HOMEenvironment variable to the directory for version 8 of the Java Development Kit (JDK). Note that the directory thatJAVA_HOMEpoints to should contain abinsubdirectory which in turn contains binaries for the Java compiler (javac) and Java runtime (java).
# Install command line tools. NOTE: If you have Xcode installed, these may
# already be installed.
xcode-select --install
# Download and Install Java SE 8 from:
+# https://www.oracle.com/technetwork/java/javase/downloads/index.html.
+# This installs the JDK 8, a superset of the JRE.
+# Alternatively, install AdoptOpenJDK 8 with Homebrew:
+brew tap AdoptOpenJDK/openjdk
+brew install --cask adoptopenjdk8
If you do not have Xcode installed and you get the following error
error: active developer path ("/Applications/Xcode.app/Contents/Developer") does not existthen run
xcode-select --resetto reset the command-line tools path to where the command line tools are installed.
Brew install
You have two choices when using Homebrew. You can choose to get the latest binary release:
brew tap facebook/fb
brew install buck
Or, you can get the latest code and build it locally:
brew update
brew tap facebook/fb
brew install --HEAD buck
Build from Source
Prerequisites
To manually build Buck, download and install the following prerequisites:
- Command Line Tools
Oracle Java Development Kit version 8 (support for future versions is in the works)
- Apache Ant 1.9 (or newer)
- Python 2.7
- Git
- Watchman
We strongly recommended that you install Watchman. With watchman, Buck uses a daemon (buckd) which prevents Buck from needing to parse all of your build files every time you build—and it caches some other components of your build as well.
You can use Homebrew to install many of the prerequisites on a Mac.
# Install Command Line tools first. NOTE: If you have Xcode installed, these may
# already be installed.
xcode-select --install
# Then the JDK (superset of the JRE)
brew update
brew tap caskroom/cask
brew tap caskroom/versions
brew cask install java8
# Then...
brew install ant python git watchman
If you do not have Xcode installed and you get the following error
error: active developer path ("/Applications/Xcode.app/Contents/Developer") does not existthen run
xcode-select --resetto reset the command-line tools path to where the command line tools are installed.
Build
Once you have the above tools installed, you can build Buck as follows:
git clone https://github.com/facebook/buck.git
cd buck
ant
./bin/buck build --show-output buck
buck-out/gen/programs/buck.pex --help
If everything worked correctly, you should see something like:
buck build tool
usage:
  buck [options]
  buck command --help
  buck command [command-options]
available commands:
  audit       lists the inputs for the specified target
  build       builds the specified target
  cache       makes calls to the artifact cache
  clean       deletes any generated files
  fetch       downloads remote resources to your local machine
  install     builds and installs an application
  kill        kill buckd for the current project
  killall     kill all buckd processes
  project     generates project configuration files for an IDE
  query       provides facilities to query information about the configured target nodes graph
  root        prints the absolute path to the root of the current buck project
  run         runs a target as a command
  server      query and control the http server
  targets     prints the list of buildable targets
  test        builds and runs the tests for the specified target
  uninstall   uninstalls an APK
  uquery      provides facilities to query information about the unconfigured target nodes graph
options:
 --help         : Shows this screen and exits.
 --version (-V) : Show version number.
Because you will likely be running ./bin/buck often, you should add it to your path so that you can simply run buck from the command line.
Build from Source
Prerequisites
To manually build Buck, download and install the following prerequisites:
- Oracle Java Development Kit version 8 (support for future versions is in the works)
- Apache Ant 1.9 (or newer)
- Python 2.7
- Git
- Watchman
With watchman, Buck will use a daemon which will prevent Buck from parsing all of your build files every time and cache some other things as well. It is strongly recommended that you install Watchman.
You can use Chocolatey to install many of the prerequisites on Windows.
choco install jdk8 ant python2 git
# install watchman as stated in the watchman prerequisite link above
You can use your distro's package manager (e.g., apt) to install many of the prerequisites on Linux. For example on Ubuntu 16.04, you can run the following:
sudo apt-get update
sudo apt-get install default-jdk ant python2 git
# install watchman as stated in the watchman prerequisite link above
For some distros, the default packages may be older than what you would like. In those cases, either build those packages from source, or find third party repositories beyond the default that is used byapt-getviasudo add-apt-repository(or however you add new repositories on your distro).
Set Location of Android SDK and NDK
You will need to tell Buck where to find the Android SDK and NDK.
To find the location of the Android SDK, Buck looks at the following values in the following order:
ANDROID_SDKenvironment variableANDROID_HOMEenvironment variableANDROID_SDK_ROOTenvironment variable- The value of the
[android].sdk_pathproperty in.buckconfig.
To find the location of a specific NDK, Buck looks at the following values in the following order:
ANDROID_NDKenvironment variable.NDK_HOMEenvironment variable.- The value of the
[ndk].ndk_pathproperty in.buckconfig.
If you have multiple NDKs installed into a single enclosing directory, you can specify this directory to Buck using either of the following values:
ANDROID_NDK_REPOSITORYenvironment variable.- The
[ndk].ndk_repository_pathproperty in.buckconfig.
.buckconfig setting, the environment variable takes precedence.If you specify an NDK repository, Buck selects the NDK based on the version that you specify in the [ndk].ndk_version property of .buckconfig.
Build
Once you have the above tools installed, you can build Buck as follows:
git clone https://github.com/facebook/buck.git
cd buck
ant
.\bin\buck build --show-output buck
buck-out\gen\programs\buck.pex --help
git clone https://github.com/facebook/buck.git
cd buck
ant
./bin/buck build --show-output buck
buck-out/gen/programs/buck.pex --help
If everything worked correctly, you should see something like:
buck build tool
usage:
  buck [options]
  buck command --help
  buck command [command-options]
available commands:
  audit       lists the inputs for the specified target
  build       builds the specified target
  cache       makes calls to the artifact cache
  clean       deletes any generated files
  fetch       downloads remote resources to your local machine
  install     builds and installs an application
  kill        kill buckd for the current project
  killall     kill all buckd processes
  project     generates project configuration files for an IDE
  query       provides facilities to query information about the target nodes graph
  root        prints the absolute path to the root of the current buck project
  run         runs a target as a command
  server      query and control the http server
  targets     prints the list of buildable targets
  test        builds and runs the tests for the specified target
  uninstall   uninstalls an APK
options:
 --help         : Shows this screen and exits.
 --version (-V) : Show version number.
Because you will likely be running .\bin\buck often, you should add it to your path so that you can simply run buck from the command line.
Because you will likely be running ./bin/buck often, you should add it to your path so that you can simply run buck from the command line.
Trying Buck
Now that Buck is installed, it is time to use Buck in a sample project.
Clone Buck samples repo
git clone https://github.com/fbsamples/bucksamples.git
cd bucksamples/cross-platform-scale-2015-demo/
Key iOS files
This sample app has all the files necessary to use Buck to build an iOS project. From the root directory, you will find:
ios/main.m: The main iOS file supported by other views, controllers and associated resources.ios/BUCK: The build file is what makes Buck work. It defines all the build rules for your source code. A build rule may also include dependencies (viadeps), which may be from other build files..buckconfig: A.buckconfigfile allows for various flag and alias settings for any project (even beyond iOS) within the root directory.
Build the iOS sample
In order to build the app, you use the buck build command, specifying your app as the target. The target may be defined in the [alias] section in the .buckconfig file or it would be the name of your iOS project prepended by //[the directory where your project is located]: (e.g., //ios:BuckDemoApp).
# From the root `cross-platform-scale-2015-demo/` directory
# demo_app_ios is an alias in .buckconfig for //ios::BuckDemoApp. Either works.
buck build demo_app_ios
You should see output similar to:
buck build demo_app_ios
[-] PROCESSING BUCK FILES...FINISHED 0.0s [100%]
[-] DOWNLOADING... (0.00 B/S AVG, TOTAL: 0.00 B, 0 Artifacts)
[-] BUILDING...FINISHED 0.7s [100%] (1/1 JOBS, 0 UPDATED, 0 [0.0%] CACHE MISS)
The first time you build, you will most likely see a longer time and cache misses. Subsequent builds should be much faster, with minimal cache misses.
Buck outputs its results in the buck-out/ directory.
Run the Built iOS App
Now that you know your app has built successfully, you can install and run the app with buck install. This command both compiles and installs the application on the iOS simulator. Using the --run flag will launch the simulator as well.
buck install --run demo_app_ios
Successfully launched demo_app_ios. To debug, run: lldb -p 50240
[-] PROCESSING BUCK FILES...FINISHED 0.0s [100%]
[-] DOWNLOADING... (0.00 B/S AVG, TOTAL: 0.00 B, 0 Artifacts)
[-] BUILDING...FINISHED 0.3s [100%] (1/1 JOBS, 0 UPDATED, 0 [0.0%] CACHE MISS)
[-] INSTALLING...FINISHED 38.7s
Success!
If all goes well, you should see something similar to:

Trying Buck
Now that Buck is installed, it is time to use Buck in a sample project.
Clone Buck samples repo
git clone https://github.com/fbsamples/bucksamples.git
cd bucksamples/cross-platform-scale-2015-demo/
Key Android Files
This sample app has all the files necessary to use Buck to build an Android project. From the root directory, you will find:
android/java/com/facebook/buck/demo/Hello.java: The main Java file supported by other associated resources.android/BUCK: The build file is what makes Buck work. It defines all the build rules for your source code. A build rule can also include dependencies (generally viadeps), which may be from other build files, as in the case of this app..buckconfig: A.buckconfigfile allows for various flag and alias settings for any project (even beyond Android) within the root directory.
Configure the environment
Before building an app you need to configure environment variables to let Buck know the locations of Android SDK and Android NDK.
First of all, check for existing variables:
$ env | grep ANDROID_
ANDROID_HOME=<path-to-sdk>
ANDROID_NDK_REPOSITORY=<path-to-ndk>
ANDROID_SDK=<path-to-sdk>
ANDROID_SDK_ROOT=<path-to-sdk>
Set the missing variables to the locations of Android SDK and Android NDK or set the paths in your .buckconfig file.
Before building make sure you installed correct build tools and a target in Android SDK and correct version of Android NDK. You can find the required versions of these tools in .buckconfig:
- See
[android].build_tools_versionto get the version of build tools in Android SDK. [android].compile_sdk_versionpoints to the Android SDK to build against.[ndk].ndk_versionpoints to the version of Android NDK.
[android].sdk_pathis an absolute path to the Android SDK.[ndk].ndk_pathis an absolute path to the Android NDK.[ndk].ndk_repository_pathis an absolute path to a directory that contains multiple Android NDKs in subdirectories. Buck selects which NDK to use based on the value of the[ndk].ndk_versionproperty in.buckconfig.
Build the Android sample
In order to build the app, you use the buck buildcommand, specifying your app as the target. The target may be defined in the [alias] section in the .buckconfig file or it would be the name of your Android project prepended by //[the directory where your project is located]: (e.g., //android:demo-app).
# From the root `cross-platform-scale-2015-demo/` directory
# demo_app_android is an alias in .buckconfig for //android:demo-app. Either works.
buck build demo_app_android
You should see output similar to:
export ANDROID_NDK=$HOME/android-sdk
buck build demo_app_android
[-] PROCESSING BUCK FILES...FINISHED 0.0s [100%]
[-] DOWNLOADING... (0.00 B/S AVG, TOTAL: 0.00 B, 0 Artifacts)
[-] BUILDING...FINISHED 0.7s [100%] (1/1 JOBS, 0 UPDATED, 0 [0.0%] CACHE MISS)
The first time you build, you will most likely see a longer time and cache misses. Subsequent builds should be much faster, with minimal cache misses.
Buck outputs its results in the buck-out/ directory.
Run the built Android App
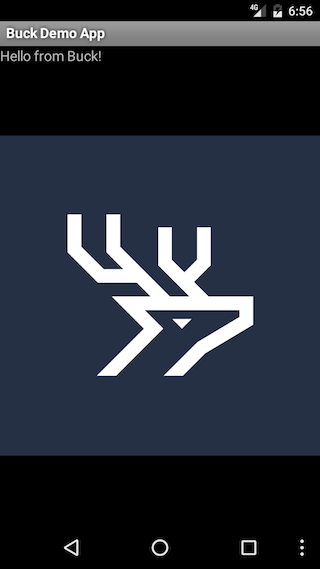
Now that you know your app has built successfully, you can install and run the app with buck install. This command both compiles and installs the application on the Android emulator. Using the --run flag will launch the emulator as well.
buck install --run demo_app_android
Installing apk on emulator-5554 (android-emulator).
[-] PROCESSING BUCK FILES...FINISHED 0.1s [100%]
[-] DOWNLOADING... (0.00 B/S AVG, TOTAL: 0.00 B, 0 Artifacts)
[-] BUILDING...FINISHED 0.8s [100%] (1/1 JOBS, 0 UPDATED, 0 [0.0%] CACHE MISS)
[+] INSTALLING...0.9s
Successfully ran install apk //android:demo-app on 1 device(s)
Starting activity com.facebook.buck.demo/.App...
Successfully ran start activity on 1 device(s)
If you get an error either that you do not have certain Android add-ons (e.g., Google APIs) or that there is no emulator to run, you should launch the Android SDK Manager (e.g.,android sdk) and install the appropriate packages and/or run your emulator (usually found underTools | Manage AVDs).
Success!
If all goes well, you should see something similar to:
Trying Buck
Now that Buck is installed, it is time to use Buck in a sample project. In particular, we are going to build a simple Java "Hello Buck" library and application.
Clone Buck samples repo
git clone https://github.com/fbsamples/bucksamples.git
cd bucksamples/hello-buck-java/
Key Java Files
We are going to be building a Java application that prints out "Hello Buck". The code to build the application consists of both a library and app component. To build this Java application, the code you cloned has all the files necessary. From the hello-buck-java directory, you will find:
com/facebook/buck/demo/HelloBuckJava.java: The main Java application file.com/facebook/buck/demo/HelloStringJava.java: A simple Java library with one function that the main app calls.com/facebook/buck/demo/BUCK: This build file is what makes Buck work and is the trigger for building the application. It defines all the build rules for your source code. The key rules you will see in this file isjava_binaryandjava_library. A build rule may also include dependencies (generally viadeps), which may be from other build files..buckconfig: A.buckconfigfile allows for various flag and alias settings for any project (even beyond this Java application, if they existed) within thehello-buck-javadirectory.
Build the Java application
In order to build the library, you use the buck build command, specifying your app as the target. The target may be defined in the [alias] section in the .buckconfig file or it would be the name of your Java application prepended by //[the directory where your project is located]: (e.g., //com/facebook/buck/demo:hello-buck-java).
# From the root `hello-buck-java/` directory
# hello_buck_java is an alias in .buckconfig for //com/facebook/buck/demo:hello-buck-java. Either works.
buck build hello_buck_java
You should see output similar to:
[-] PROCESSING BUCK FILES...FINISHED 0.0s [100%]
[-] DOWNLOADING... (0.00 B/S AVG, TOTAL: 0.00 B, 0 Artifacts)
[-] BUILDING...FINISHED 0.8s [100%] (1/1 JOBS, 0 UPDATED, 0 [0.0%] CACHE MISS)
The first time you build, you will most likely see a longer time and cache misses. Subsequent builds should be much faster, with minimal cache misses.
Buck outputs its results in the buck-out/ directory.
Run the Built Java Application
Now that you know your app has built successfully, you can install and run the app with buck run. This command both compiles and runs the application.
buck run hello_buck_java
[-] PROCESSING BUCK FILES...FINISHED 0.0s [100%]
[-] DOWNLOADING... (0.00 B/S AVG, TOTAL: 0.00 B, 0 Artifacts)
[-] BUILDING...FINISHED 0.4s [100%] (1/1 JOBS, 0 UPDATED, 0 [0.0%] CACHE MISS)
Hello Buck
Success!
If all goes well, you should see something similar to:
Hello Buck